Trench Drain Installation Guide: Best Practices for HDPE and Concrete Systems
Installing a trench drain system can seem complex, but with the right approach, it becomes a straightforward process. TrenchDrainCo’s step-by-step guide ensures a professional-grade installation for HDPE, fiber-reinforced concrete (FRC), and polymer concrete trench drains. Whether you're installing a drain in a commercial, industrial, or residential setting, following best practices will enhance durability, efficiency, and long-term performance.
Understanding Load Classes and Excavation Requirements
Proper excavation and reinforcement are critical for ensuring a trench drain system performs under expected loads. The table below outlines minimum excavation dimensions based on load class:
For pedestrian traffic, a 1/8-inch recess is recommended, while vehicular applications require a 1/4-inch recess to ensure smooth transitions and prevent grate displacement.
How to Install an HDPE Trench Drain System
HDPE trench drains are known for their lightweight design, corrosion resistance, and ease of installation. Follow these step-by-step instructions to ensure a precise and secure installation.
1. Preparation & Required Tools
Gather the necessary materials before starting the installation:
- HDPE trench drain channels
- Sealant and caulking gun
- Level and string line
- Vibrator for concrete compaction
- Shovel and rebar for securing channels
Each channel has flow direction arrows that must be aligned correctly.
2. Excavation
Excavate according to load class specifications, ensuring the correct slope for water drainage. A typical trench drain system requires a .5-.7% slope for optimal flow.
3. Assembly & Channel Layout
- Arrange HDPE trench drain channels alongside the trench, starting at the deepest point (outlet not cap)
- Install expansion joints as per project specifications to prevent cracking.
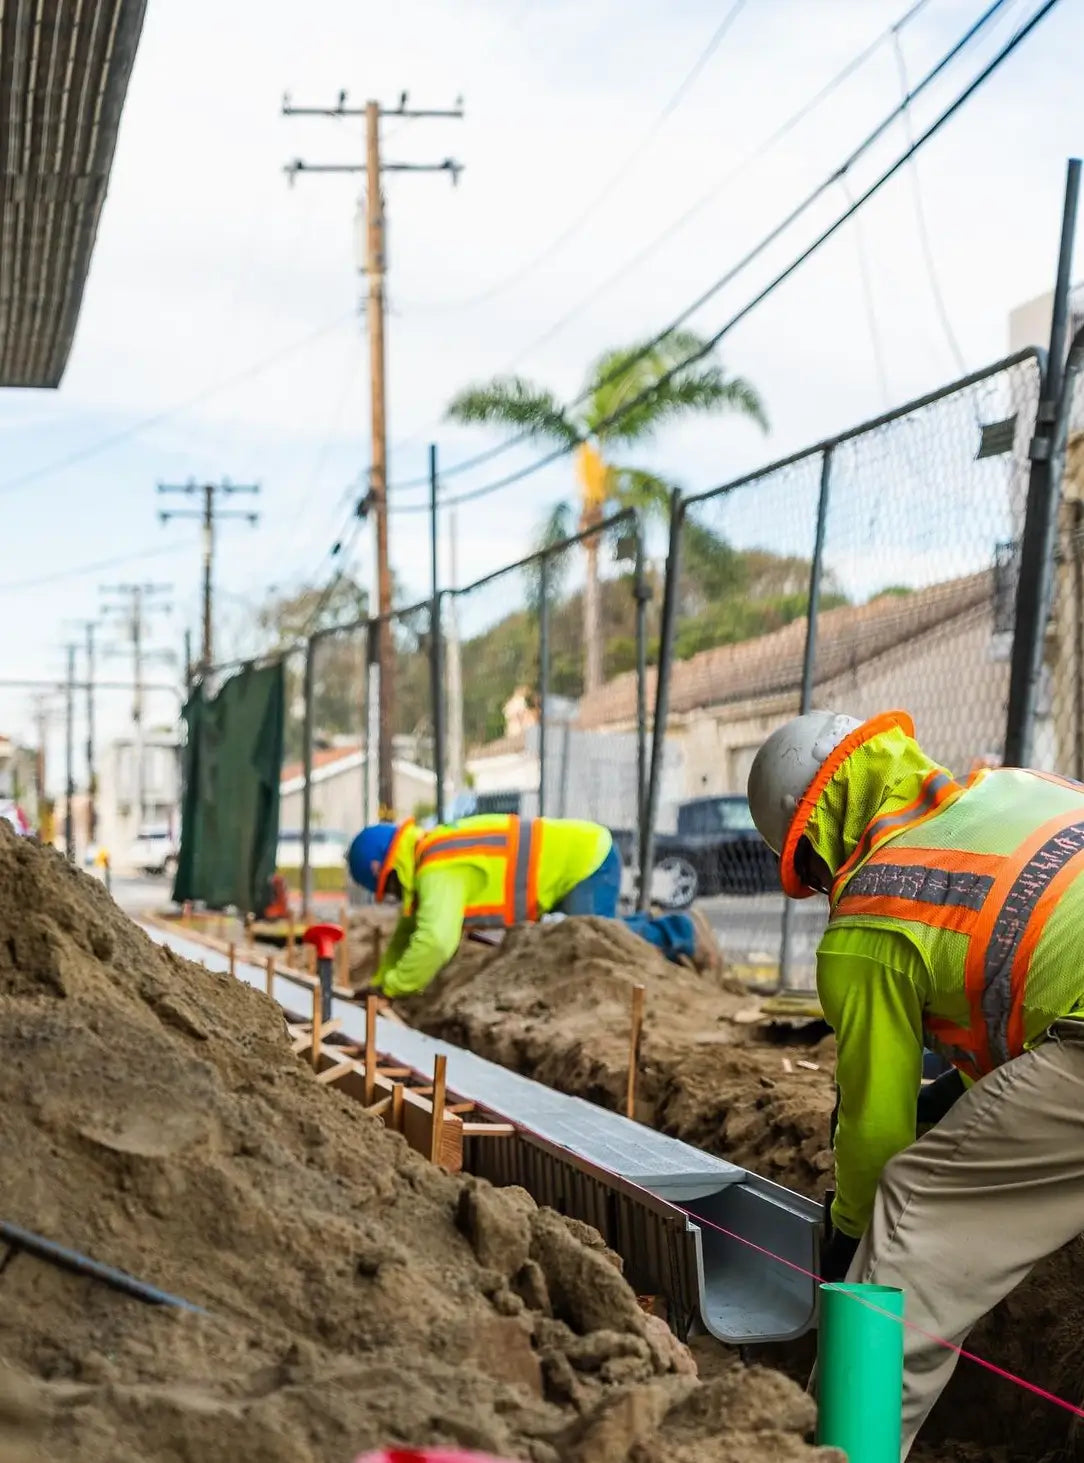
4. String Line Setup
Set a string line to establish the final trench elevation. If using ductile iron frames, set the line 1 inch below the finished grade to ensure proper installation.
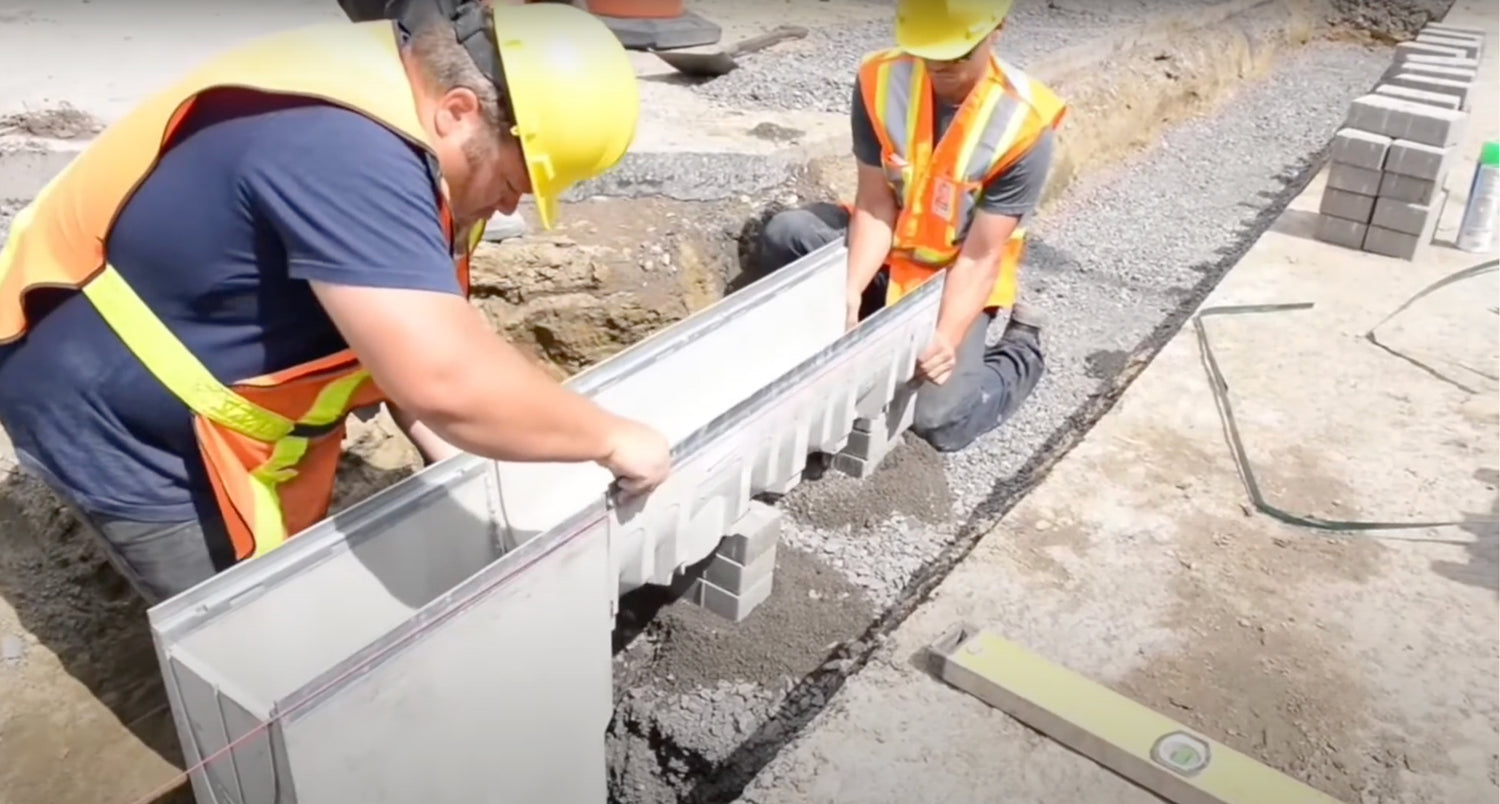
5. Channel Installation
- Connect channel sections securely, beginning from the outlet.
- Use blank grate inserts and screws to keep channels properly aligned.
- Insert rebar anchors into designated slots and drive them into the ground for stabilization.
6. Concrete Pouring & Stabilization
- Pour the first lift of concrete evenly along both sides of the channel.
- Use a vibrator to remove air pockets and ensure solid compaction.
- Allow the first layer to set before adding additional layers.
7. Grate Installation
After 24 hours of curing, remove blank inserts and install the final grates. Allow full concrete curing before opening the system to traffic.
How to Install Fiber-Reinforced Concrete (FRC) and Polymer Concrete Systems
Unlike HDPE trench drains, fiber-reinforced concrete (FRC) and polymer concrete channels require careful handling due to their rigidity and weight. These systems offer higher strength and impact resistance, making them ideal for heavy-duty applications.
1. Preparation & Safety Measures
- Wear protective gear when cutting or grinding concrete channels to prevent inhalation of dust.
- Ensure no flammable materials are near cutting areas when using saws or grinders.
2. Excavation
Follow the same excavation depth and width requirements as HDPE systems, ensuring a stable, compacted trench bottom to prevent settlement over time.
3. Fabrication & Cutting
- Cutting may be required for miters, tee junctions, or non-standard lengths.
- Use a diamond disc saw or band saw to create precise cuts for seamless channel connections.
4. Positioning the Channels
FRC and polymer concrete trench drains can be placed using three primary methods:
- Patty Method: Small concrete "patties" hold the channel in place before pouring the main concrete slab.
- Hanging Method: Channels are suspended using brackets or wires to ensure proper elevation.
- Installation Device: Specialized tools maintain accurate placement and alignment during setup.
5. Concrete Pouring & Securing Channels
- Cover channel openings with plywood to prevent concrete ingress.
- Use 4,000 psi concrete for structural integrity.
- Pour evenly on both sides, vibrating to eliminate air voids.
6. Finishing & Final Adjustments
- Remove protective covers after 24 hours.
- Install grates and apply flexible sealant at expansion joints to prevent cracking.
- Complete pavement or brick paver finishing according to the project plan.
Why Proper Trench Drain Installation Matters
A well-installed trench drain system prevents water pooling, structural damage, and premature failure. Proper techniques enhance:
-
System Longevity
Prevents shifting, cracking, and misalignment over time.
-
Optimal Flow Performance
Ensures smooth water drainage with no obstructions.
-
Structural Integrity
Prevents trench collapse and extends service life.
Why Choose TrenchDrainCo for Your Trench Drain System?
TrenchDrainCo specializes in high-performance drainage solutions designed for easy installation and long-term durability. Whether you're a contractor, engineer, or first-time installer, our expertly crafted trench drain systems provide:
-
Comprehensive Installation Support
Step-by-step guides and technical resources.
-
Engineered Durability
Systems built to withstand heavy traffic, weather extremes, and industrial environments.
-
Customization & Expert Assistance
Tailored solutions for residential, commercial, and industrial projects.
Get Started with Your Trench Drain Installation
For expert guidance and customized trench drain solutions, contact TrenchDrainCo today. Our team is ready to assist with product selection, installation best practices, and project planning.
📞 Call us: 212-946-3798
📧 Email us: info@trenchdrainco.com
TrenchDrainCo – The Trusted Name in High-Performance Drainage Systems.


